
In this post I will give you some background on PaaS. Then I will show how you can create a IBM DevOps Services project, that is linked to GitHub, with automatic deployment to IBM Bluemix after code has been committed to the GitHub project.
The old way
One of the huge time saving benefits solved by cloud computing would be appreciated by anyone who understands the process for running and deploying websites. There have always been ways to automate code deployments to some extent, but there are requirements for certain things to be in place. These include:
- A web hosting or VPS provider
- Certain infrastructure components ready to go such as an operating system installed (e.g.: Red Hat, Ubuntu, etc), load balancing, SSL certificate management, and system administration
- Sizing of the VM to deal with the expected loads and other capacity planning activities
- Processes for dealing with patching and security vulnerabilities, and actually patching your website VM’s
- Upgrading VM’s with later OS revisions, and dealing with the dependency issues this can cause
- Website code staging and deployment processes
- Database administration and management
The list is certainly not exhaustive, but you get the idea.
The new way (PaaS)
Platform as a Service (PaaS) conceptually, is usually wedged between Infrastructure as a Service (IaaS) and Software as a Service (SaaS). In effect – PaaS provides everything in the list above and more! You do not need to care about the underlying infrastructure, scaling up/down, storage, or compute capacity. All the IaaS components are abstracted from you and all the developer needs to do is write and deploy code. It really is that simple.
Keep in mind, developing for PaaS (and cloud in general really) requires slightly different thinking for “cloud first” applications. For example, your filesystem needs to be treated as ephemeral, you need to keep client state server side somehow, and you would likely require the use some type of message passing technology to share information between application instances.
This leads me onto the main topic for this post. IBM’s PaaS strategy revolves around IBM Bluemix. In 2013, IBM teamed up with Pivotal to announce a collaboration in PaaS using the CloudFoundry framework. Please watch this video for a great overview of CloudFoundry.
Essentially, IBM Bluemix gives a dashboard where you can deployment applications, that consume services. An application might be written in Python, and require the use of a MySQL service for storing structured data. You bind the two together, and you have a scalable application without any infrastructure configuration at all! That is the magic and the key benefit. It allows you to work on your business problem, not having to deal with infrastructure.
IBM provides DevOps Services (previous name JazzHub) that provides a Git compatible environment for version control, an in browser IDE, “DevOps” style work tracking and team planning functionality, and deployment services to IBM Bluemix.
Things you need if you are following along at home:
- A free IBM.com id (just go to http://www.ibm.com/ and click Register on the top right)
- A free GitHub account (https://github.com/)
- A free IBM Bluemix account (https://bluemix.net/)
- A free IBM DevOps Services account linked to your Bluemix account
When logged into IBM DevOps Services, click the big blue “Create Project” button on the right.

Give your project a name, and click the “Connect to an external GitHub repository” button. Then enter the GitHub URL for your project (it should already exist).

On the next screen, enter the options you want, but if you want auto “DevOps” style deployments to Bluemix make sure the Deploy to Bluemix checkbox is selected.
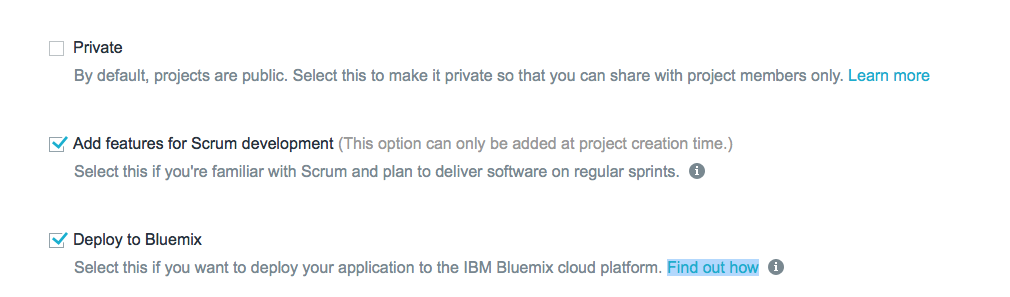
Details of your project should pop up, and you can select which branch you want to track. Leave the defaults if you are not sure.
![]()
In your project screen click on the top right the orange “Build & Deploy” button and you should see an empty pipeline. We need to add a builder, which detects code changes then starts the build process, and we also need to add a stage which for us will be deploying to Bluemix.

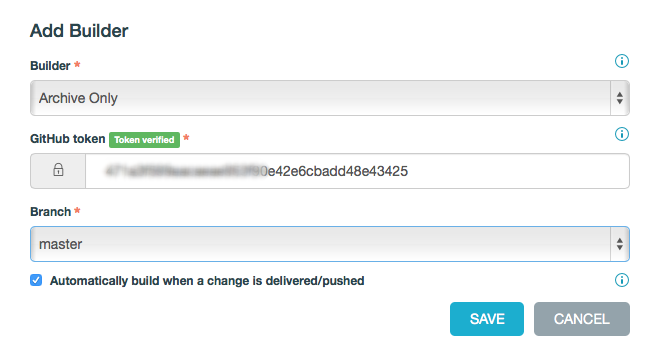
Before we can add a builder we need a Github personal access token. Go to GitHub and click on the settings icon then click Applications on the menu bar to the left. Click “Generate new token”. Enter a description and leave the remaining defaults.

Now back to your deployment configuration, click on the Plus sign in “add a builder” and enter the config as shown, and enter your GitHub token as shown.
Now click on the other Plus sign to add a deployer stage. For organisation enter your email address but it doesn’t really matter. Enter your application name and click Save.

Now everything should look ready to go!

Clone your github repo and force a push:
$ git clone https://github.com/mattgillard/mysql_flaskr.git
$ cd mysql_flaskr
Make a minor change to the source code, and push it
$ git commit -a
[master ab88237] Updated <h1> in layout
1 file changed, 1 insertion(+), 1 deletion(-)
$ git push
Counting objects: 7, done.
Delta compression using up to 4 threads.
Compressing objects: 100% (4/4), done.
Writing objects: 100% (4/4), 425 bytes | 0 bytes/s, done.
Total 4 (delta 2), reused 0 (delta 0)
To https://github.com/mattgillard/mysql_flaskr.git
4261d41..ab88237  master -> master
Soon after you push it, your pipeline will start moving and a minute or so later you should see a green traffic light and a deployment success:
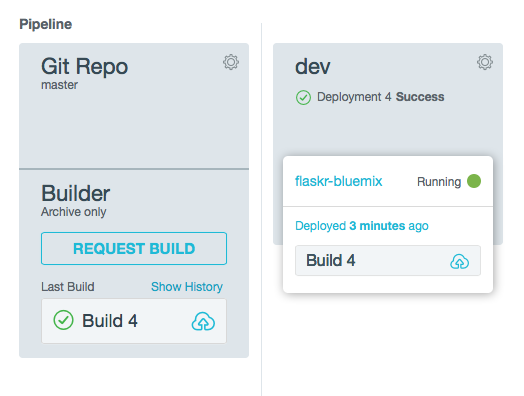
You will see your app appear in the IBM Bluemix dashboard with the deployment log on the right:

Back in DevOps Services, click on the deployment success URL and it will switch you into your detailed log, where you can see all the steps that were taken to deploy the application.

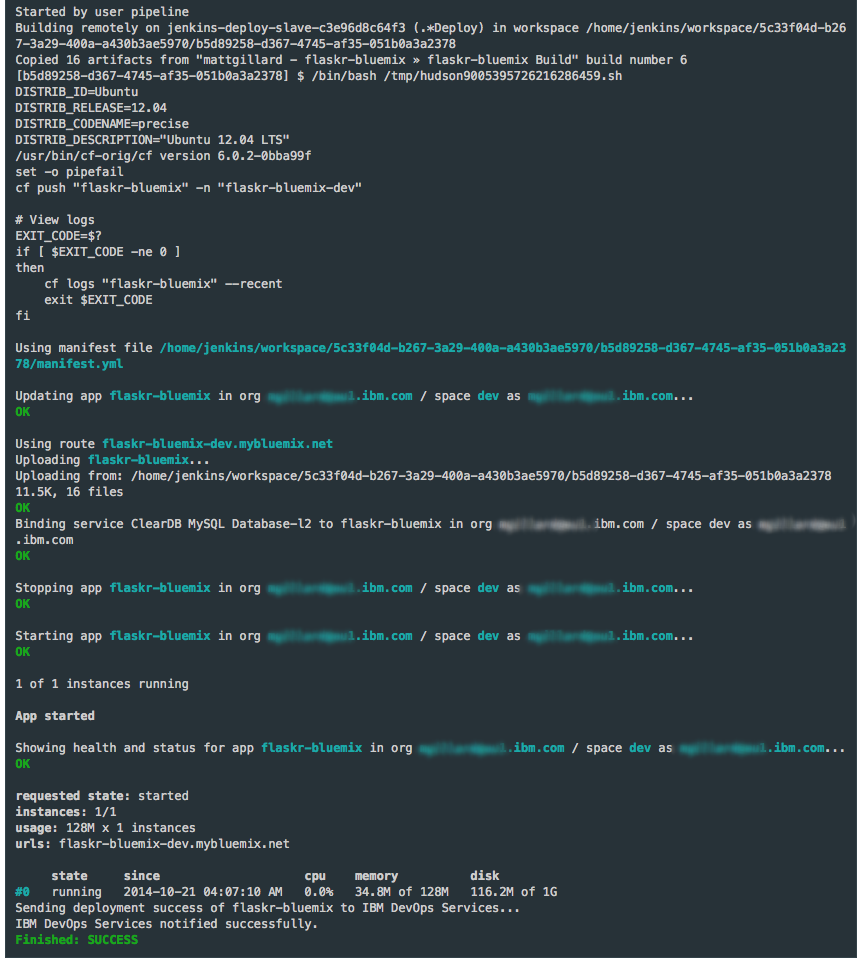
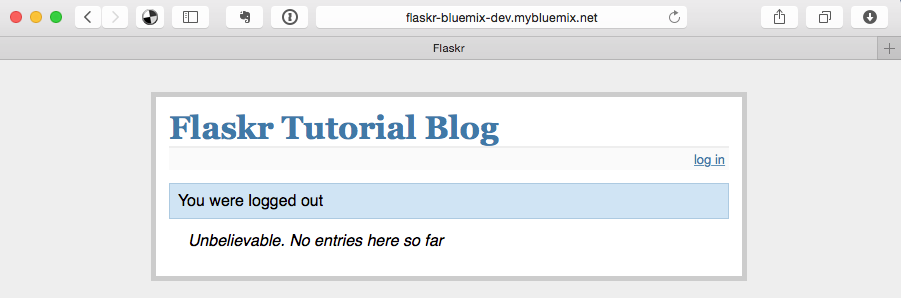
When your app is deployed, you can then go to the Internet URL to see it live on the Internet (in this case it is: http://flaskr-bluemix-dev.mybluemix.net).
There you have it – a relatively straightforward process to connect up an existing Github repository with IBM DevOps Services & IBM Bluemix!
The next post will talk about the metadata files you need in your project so Bluemix can deploy it.

Nice write up!